
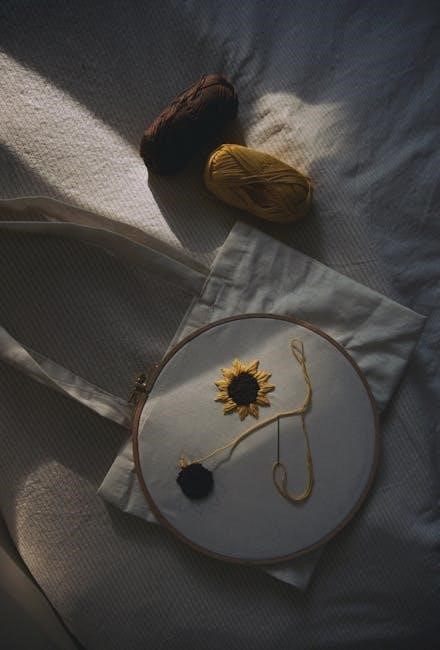
Cross stitch is a timeless, relaxing craft offering creative expression. Perfect for mindfulness, it allows crafters to produce beautiful, personalized designs with thread and fabric.
What is Cross Stitch?
Cross stitch is a popular form of counted needlework that involves creating designs on fabric using a needle and thread. It is characterized by the use of X-shaped stitches, known as “full cross stitches,” which are stitched onto a fabric grid following a pattern. The craft is versatile, allowing for both simple and intricate designs, and can be used to create decorative items like cushions, wall art, and clothing. Cross stitch is often enjoyed for its meditative nature and the satisfaction of seeing a design come to life. It is suitable for crafters of all skill levels, making it a great hobby for beginners and experienced stitchers alike.
History of Cross Stitch
Cross stitch has a rich history that spans thousands of years, with evidence of its practice dating back to ancient civilizations in Egypt, China, and the Middle East. Early examples of cross stitch were found in Coptic tomb decorations and traditional clothing. The craft evolved through the Middle Ages in Europe, where it was used to embellish religious and royal textiles. By the 18th century, cross stitch became popular among the upper class for creating decorative household items. The industrial revolution made materials more accessible, spreading the craft globally. Today, cross stitch remains a beloved pastime, blending traditional techniques with modern designs and materials, appealing to crafters worldwide.
Benefits of Cross Stitch for Beginners
Cross stitch offers numerous benefits for beginners, making it an ideal hobby for relaxation and creativity. It helps reduce stress and anxiety by focusing the mind on repetitive, calming stitches. The craft encourages patience and dedication, fostering a sense of accomplishment as projects progress. Cross stitch also enhances fine motor skills and hand-eye coordination, while providing an outlet for artistic expression. Beginners can start with simple patterns, building confidence and skill over time. Additionally, cross stitch is portable, allowing crafters to work on projects anywhere. The therapeutic nature of stitching makes it a popular choice for mindfulness and self-care, while the finished pieces serve as lasting, personalized creations to cherish or gift.
Essential Materials for Cross Stitch
Cross stitch requires basic supplies like fabric (Aida, Evenweave, or Linen), embroidery floss, needles, scissors, and a pattern or kit to get started creatively.
Fabric Types (Aida, Evenweave, Linen)
Fabric Types (Aida, Evenweave, Linen)
The choice of fabric is crucial for cross stitch. Aida cloth is popular among beginners due to its soft, even weave and visible holes, making stitching straightforward. Evenweave fabric, like cotton or linen blends, offers a denser weave and is ideal for more intricate designs. Linen fabric is the most traditional and durable option, perfect for heirloom pieces. Each fabric type has unique characteristics, and the choice depends on the desired project outcome. Aida is great for quick results, while Evenweave and Linen provide a more authentic stitching experience. Selecting the right fabric ensures a smooth and enjoyable stitching process.
Thread and Floss Selection
Thread and floss selection is essential for achieving vibrant and durable cross stitch results. Stranded cotton is the most commonly used material, available in hundreds of colors. Embroidery floss, made from cotton or silk, offers a wide range of hues and textures. Specialty threads, such as metallic or variegated floss, add unique effects to designs. When choosing threads, consider the color accuracy, durability, and texture to match your project’s needs. Proper storage on bobbins or cards prevents tangling and fades. Always follow care instructions to maintain the thread’s quality and ensure your finished work remains pristine. The right thread selection enhances both the stitching experience and the final outcome.
Needles and Scissors
Choosing the right needles and scissors is crucial for a seamless cross stitching experience. Tapestry needles, with their blunt tips and large eyes, are ideal for stitching on fabric. The size of the needle depends on the fabric type; smaller needles work best for finer fabrics, while larger ones suit thicker materials. Sharp embroidery scissors are essential for cutting threads cleanly and precisely. Dedicated embroidery scissors should be used only for cutting embroidery floss to maintain their sharpness. High-quality tools ensure smooth stitching and prevent frayed threads or fabric damage. Proper care, such as storing needles safely and keeping scissors clean and dry, extends their lifespan and performance. Investing in good-quality needles and scissors enhances both the stitching process and the final result.
Patterns and Kits
Cross stitch patterns and kits are essential for guiding crafters through their projects. Patterns provide detailed designs, often with color charts and symbols, allowing stitchers to replicate intricate designs. Kits typically include pre-selected materials like fabric, thread, and needles, making it easy for beginners to start. Many kits cater to skill levels, offering options for small, simple projects or complex, large-scale designs. Online resources and tutorials often accompany patterns, helping crafters understand techniques and troubleshoot common mistakes. Whether choosing a pre-made kit or customizing a pattern, these tools empower crafters to bring their creative visions to life with precision and confidence.

Basic Cross Stitch Stitches
Mastering basic cross stitch stitches is foundational. The full cross stitch, half stitch, and backstitch are essential techniques for creating clear, detailed, and visually appealing designs.
The Full Cross Stitch
The full cross stitch is the most common stitch, forming an “X” shape. To create it, bring the needle up at the center of the stitch, insert it diagonally to the lower right, then cross over to the upper left. This stitch is the foundation of most designs. Proper tension ensures even fabric. Beginners should practice on scrap fabric to master the technique, ensuring the stitch lies flat and the fabric remains taut without puckering. Even stitching is key for a professional finish, making the full cross stitch a skill every embroiderer should perfect early on for consistency and quality in their work.
Half Stitch and Quarter Stitch
The half stitch and quarter stitch are essential for adding detail and shading. The half stitch, a diagonal line, is used for subtle color transitions. The quarter stitch, a smaller diagonal, adds fine details. Both stitches enhance design depth. They are often used in intricate patterns. Proper tension is crucial for texture consistency. Beginners should practice these stitches to master control over thread placement. They are versatile and widely used in modern designs. Understanding these stitches expands creative possibilities. Start by practicing on scrap fabric to ensure even stitching. These stitches are key elements in creating visually appealing and professional-looking cross stitch projects.
Backstitch for Outlines
Backstitch is a linear stitch used for outlining designs and creating bold, defined lines. Unlike the full cross stitch, it consists of straight stitches worked in a continuous line. This stitch is essential for adding structure and clarity to patterns. To work a backstitch, insert the needle in one direction, then bring it back in the opposite direction, creating a straight line. It’s often used for text, borders, and detailing. For best results, use one strand of floss and maintain consistent tension. Backstitch enhances the visual appeal of your project by providing sharp, clean outlines. Practice on scrap fabric to master this technique, which is crucial for professional-looking results.

Reading a Cross Stitch Pattern
Understanding the pattern key is essential for identifying colors and symbols. It serves as a roadmap, guiding stitchers through the design; Each symbol corresponds to a specific stitch, ensuring accuracy and creativity in your work.
Understanding the Pattern Key
The pattern key is a crucial tool for cross stitchers, decoding symbols and colors. It provides a detailed legend, matching each symbol to its corresponding floss color. This ensures consistency and accuracy in stitching. Typically, the key includes a visual guide, with symbols and color codes clearly defined. Many patterns also include a DMC or Anchor thread reference, making it easy to identify the correct floss. Novice stitchers should always start by studying the key to avoid confusion. It’s a foundational step that helps bring the design to life. Proper understanding of the key ensures a flawless and enjoyable stitching experience.
Symbol and Color Codes
In cross stitch, symbols and color codes are essential for interpreting patterns. Each symbol represents a specific stitch or color, ensuring precise execution. These codes are usually found in the pattern key, making it easy to identify thread colors and stitches. Symbols vary from simple shapes to intricate designs, each corresponding to a unique floss color. The grid system helps align these symbols accurately on the fabric. Understanding these codes is vital for achieving the desired design.
Beginners should carefully match symbols to colors, using thread brands like DMC or Anchor as references. This system ensures consistency and accuracy, allowing stitchers to bring their projects to life seamlessly;
Counting and Aligning Stitches
Accurate counting and alignment are crucial for cross stitch success. Start by locating the center of the fabric, marked during preparation, and align it with the pattern’s center. Use the grid system on the pattern to guide your stitches, ensuring each one is placed correctly. Count threads on the fabric to maintain alignment, especially when moving between sections. Small mistakes can throw off the entire design, so double-check your work regularly. Practical tips include marking the center with a pin or thread and counting in both directions to avoid errors. This attention to detail ensures your project remains balanced and visually appealing from start to finish.

Preparing to Stitch
Organize supplies, stretch fabric tightly on a hoop or frame, and locate the center. Patience and attention to detail ensure a smooth, enjoyable stitching experience.
Gathering and Organizing Supplies
To begin, gather essential materials like fabric (Aida, Evenweave, or Linen), embroidery floss, needles, scissors, and a pattern or kit. Organize supplies in a dedicated box or bag for easy access. Store threads on bobbins or cards to prevent tangling. Keep scissors and needles in a small pouch to avoid misplacement. Ensure your workspace is clean and well-lit for comfort. Pre-wash and iron fabric to remove sizing and shrinkage. Mount fabric on a hoop or frame to maintain tension. Having everything ready saves time and reduces frustration, allowing you to focus on stitching. Proper organization is key to a smooth and enjoyable experience.
Stretching and Securing the Fabric
Stretching and securing the fabric is essential for maintaining even tension and preventing distortion. Use an embroidery hoop or frame to keep the fabric taut. Place the fabric over the hoop, ensuring it is centered and smooth. Tighten the hoop gently but firmly to avoid puckering or loosening. For frames, attach the fabric with clips or tape, adjusting as needed; Properly secured fabric ensures stitches lie flat and even, making the stitching process easier and the finished piece look professional; Regularly check and adjust the tension to maintain consistency throughout your project. Even tension is key to achieving crisp, uniform stitches.
Finding the Center of the Fabric
Finding the center of the fabric is a crucial step to ensure your design is evenly aligned. Fold the fabric in half vertically and then horizontally to locate the center point. Use a pin or a small marker to denote this spot. For even accuracy, measure the fabric dimensions and calculate the midpoint. Lightly mark the center with a pencil or temporary marking tool. This ensures your pattern starts correctly and remains symmetrical. Proper alignment prevents uneven stitching and helps achieve a professional finish. Always double-check the center point before beginning your stitches to avoid misalignment issues later in your project. This step sets the foundation for a well-executed design.

Advanced Cross Stitch Techniques
Master advanced methods like English vs. Danish stitching, specialty stitches, and fractional stitches to enhance your designs. These techniques add complexity and elegance to projects.
Stitching Methods (English vs. Danish)
The English method involves stitching in a specific order, row by row, while the Danish method allows for more flexibility. The English approach is ideal for beginners, as it follows a structured pattern, making it easier to manage. In contrast, the Danish method enables stitching in any direction, which can be more efficient for experienced crafters. Both methods produce stunning results but cater to different stitching styles. Understanding these techniques enhances your stitching experience, allowing you to choose the method that suits your project and skill level best.
Using Specialty Stitches
Specialty stitches add intricate details and texture to cross stitch projects. Techniques like backstitch for outlines and French knots for small details enhance designs. These stitches are essential for creating depth and dimension. They often require a steady hand and patience but elevate your work. Beginners should practice on scrap fabric before incorporating them into main projects. Using a hoop or frame can help maintain tension. Start with simple specialty stitches and gradually experiment with more complex ones. These stitches are perfect for adding unique elements to your designs, making your finished pieces stand out with personality and craftsmanship.
Handling Fractional Stitches
Fractional stitches, such as half and quarter stitches, are essential for intricate designs. These smaller stitches add texture and detail without overwhelming the fabric. To handle them, align each stitch precisely, ensuring they complement the full cross stitches. Use the same floss strands but adjust the needle direction to fit the stitch size. Maintain even tension to prevent fabric distortion. Refer to the pattern key for specific symbols and guidance. Practice on scrap fabric to master these stitches. These techniques allow for delicate, detailed work, enhancing your cross stitch projects with precision and artistry. Regular practice will make handling fractional stitches second nature, elevating your stitching skills to new heights.

Common Mistakes and Tips
Common mistakes include incorrect thread length, uneven tension, and forgetting to secure floss ends. Tips: Use a hoop, work in sections, and refer to tutorials for guidance.
Mistakes to Avoid for Beginners
One common mistake is using excessive thread length, which tangles easily. Another is failing to secure floss ends, leading to loose stitches. Beginners often ignore the importance of fabric tension, causing uneven stitching. Forgetting to follow the pattern key can result in color mismatches. Skipping the center-finding step leads to misaligned designs. Tight stitching can distort the fabric, while too-loose stitching leaves gaps. Neglecting to trim excess thread creates bulk. Not using the right needle size can make stitching difficult. Skipping practice on scrap fabric before starting a project often leads to frustration. Correcting these early mistakes ensures a smoother, more enjoyable stitching experience;
Time-Saving Tips
To save time while cross stitching, organize your supplies beforehand, such as sorting threads by color and using a floss organizer. Pre-cut floss into manageable lengths to avoid frequent cutting. Stretch and secure fabric properly to maintain even tension and prevent realignment. Use the English stitching method for efficiency, as it allows continuous stitching without turning the fabric. Keep your work consistent by maintaining even stitch tension and using the same needle size. Practice on scrap fabric to master techniques before starting a project. Regularly review patterns to avoid mistakes. These tips streamline your process, ensuring a smooth and enjoyable stitching experience.
Maintaining Tension and Even Stitches
Maintaining Tension and Even Stitches
Maintaining even tension is crucial for professional-looking cross stitch results. Keep fabric taut but not overly tight, as this can distort stitches. Use a hoop or frame to help maintain consistency. Stitch in a single direction for uniformity and avoid pulling floss too tightly, which can pucker the fabric. Complete one thread color at a time to ensure even stitching. Regularly check your work and adjust tension as needed. Using the same needle size throughout prevents size inconsistencies. Keep fabric clean and avoid stitching in low light to maintain accuracy. By controlling tension and stitch size, you achieve a polished, even finish in your cross stitch projects.

Finishing Your Cross Stitch Project
Complete your project by washing and ironing the fabric gently. Stretch and frame it evenly for a polished look, adding final decorative touches if desired.
Washing and Ironing the Fabric
Properly washing and ironing your cross stitch fabric ensures a professional finish. Gently hand wash the fabric in cold water with mild detergent to remove dirt and oils. Avoid soaking, as this can distort the fabric or cause colors to bleed. Lay the fabric flat to air dry, reshaping it to maintain even tension. Once dry, iron the fabric on the wrong side using a low heat setting. For stitched areas, place a cloth or parchment paper over the design to protect it. Ironing while the fabric is slightly damp helps remove wrinkles and flattens the material, ensuring your cross stitch remains crisp and even.
Stretching and Framing
Stretching and framing your cross stitch project ensures it lies flat and maintains its shape. Use a sturdy frame or stretcher bars to pull the fabric taut, securing it evenly on all sides. Start by attaching the fabric to the frame using staples, tape, or a sewing needle. Tighten the fabric gradually, working from the center outward to avoid warping. Once secure, trim excess fabric around the edges. For a polished look, add a backing material like cardboard or interfacing to protect the stitching. Finally, frame your work in a standard picture frame or a deep frame to accommodate the fabric’s thickness, showcasing your art beautifully for years to come.
Adding Finishing Touches
Adding finishing touches enhances your cross stitch project’s presentation and longevity. Begin by gently washing the stitched fabric in cold water to remove any oils or residue. Lay it flat to air dry, then iron the backside to flatten wrinkles. For a professional look, stretch and frame the piece as desired. Consider adding embellishments like beads or sequins for extra flair. Optional, apply a fabric sealant to protect the stitching. Finally, attach a personalized label or signature to commemorate your work. These steps ensure your project is not only visually appealing but also well-preserved for years to come, making it a cherished keepsake or gift.

Popular Cross Stitch Projects
Cross stitch offers a variety of popular projects, from small motifs to intricate landscapes. Beginners often start with kits, while experienced stitchers explore complex, personalized designs, making it versatile for all skill levels.
Small Projects for Beginners
Small cross stitch projects are ideal for beginners, offering a great way to practice basic stitches and build confidence. Simple designs like ornaments, bookmarks, or samplers require minimal materials and time, making them perfect for learning. These projects allow you to focus on technique without feeling overwhelmed. Many kits are specifically designed for newcomers, providing pre-printed fabric and step-by-step instructions. Completing a small project is rewarding and helps develop the skills needed for larger designs. They also make thoughtful gifts or personal keepsakes. Starting with something small ensures a positive experience, encouraging you to continue exploring the world of cross stitch with ease and enjoyment.
Large and Complex Designs
Large and complex cross stitch designs offer a challenging yet rewarding experience for skilled crafters. These intricate patterns often feature detailed scenes, vibrant colors, and specialty stitches, requiring patience and dedication. They are perfect for those who enjoy a creative challenge and want to showcase their advanced skills. Many large designs are inspired by art, nature, or fantasy themes, making them unique and visually stunning. Organizing threads, tracking progress, and maintaining stitch consistency are crucial. These projects are ideal for stitchers who enjoy immersing themselves in long-term creations and are eager to push their expertise to new levels. The end result is a masterpiece that reflects craftsmanship and passion.
Personalizing Your Work
Personalizing your cross stitch projects allows you to infuse your unique style and creativity. You can customize patterns by adjusting colors, adding names, or incorporating meaningful symbols. Using personal imagery or quotes makes your work truly special. Experimenting with different thread colors or specialty stitches adds a personal touch. Many stitchers enjoy creating bespoke designs for gifts, making them extra thoughtful. Personalization also lets you tailor projects to suit recipients’ preferences or commemorate special occasions. Whether it’s a custom portrait, a cherished memory, or a heartfelt message, personalizing your work transforms it into a one-of-a-kind piece that reflects your personality and connection to the design.

Resources and Community
Explore online tutorials, guides, and communities for cross stitch inspiration and support. Join forums, watch videos, and discover where to buy patterns and materials for your projects.
Online Tutorials and Guides
Online cross stitch tutorials and guides are invaluable for beginners and experienced crafters alike. Websites like YouTube and crafting blogs offer step-by-step video tutorials that cover basic stitches, pattern reading, and advanced techniques. Many guides provide downloadable patterns and tips for selecting materials. For instance, tutorials often demonstrate how to execute a full cross stitch, half stitch, and backstitch, which are essential for completing projects. Additionally, some platforms feature guides tailored for specific projects, such as holiday-themed designs or personalized gifts. These resources help crafters troubleshoot common mistakes and improve their stitching skills in a supportive and accessible way.
Joining Cross Stitch Communities
Joining cross stitch communities is a great way to connect with fellow crafters, share ideas, and learn new techniques. Online forums and social media groups dedicated to cross stitch offer invaluable support and inspiration. Platforms like Facebook and Reddit host active communities where members post their projects, ask for advice, and celebrate each other’s progress. Local stitching groups and guilds also provide opportunities to meet in person, participate in workshops, and collaborate on large-scale projects. These communities foster camaraderie and help crafters stay motivated, providing a sense of belonging and shared passion for this timeless craft.
Where to Buy Patterns and Kits
Cross stitch patterns and kits can be easily found online and in craft stores. Popular online marketplaces like Etsy, Amazon, and eBay offer a wide variety of kits and digital patterns. Specialty craft stores such as Michaels, Hobby Lobby, and Jo-Ann Fabric and Craft Stores also carry a range of cross stitch supplies. Additionally, many independent designers sell their patterns through their websites or platforms like Pinterest and Instagram. For beginners, starter kits that include pre-printed fabric, thread, and needles are ideal. Online communities often recommend trusted sellers, ensuring high-quality materials and designs to suit every skill level and project preference.